ButtonGenerator.com ButtonGenerator.com ButtonGenerator.com Specific Virus Removal Guide Forum

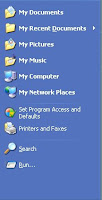
Start Menu All Programs Missing

1) Click the Start Button
2) Click the Run Command
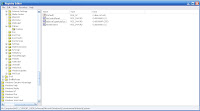
3) In the Run Command Windows type "regedt32"
4) Navigate to each of the following areas and change the value as listed:

[HKEY_CURRENT_USER\Software\Microsoft\Windows\CurrentVersion\Policies\Explorer]

Set The Value For "NoStartMenuMorePrograms" to "Zero"

5) Restart the computer
6) Now the All Programs should be back in the Start Menu

Recommended Tools:
-Try this custom tool to automatically fix your problem:

Drives Missing In My Computer

1) Click the Start Button
2) Click the Run Command
3) In the Run Command Windows type "regedt32"
4) Navigate to each of the following areas and change the value as listed:

[HKEY_CURRENT_USER\Software\Microsoft\Windows\CurrentVersion\Policies\Explorer]

Set Value For "NoDrives" to "Zero"

5) Restart the computer
6) Now the drives should appear in My Computer

Recommended Tools:
-Try this custom tool to automtically fix the problem:

Setting Up Malware Security

The most important thing you have to take into consideration after performing a virus (malware) removal on your computer is that you need protection to prevent it from happening again. This is also something to keep in mind before it happens for the first time. Just follow this guide and your computer will soon be setup to block even the most dangerous virus (malware).

Step 1: Anti-virus Protection

This is quite possibly the most important step, which is why it is #1. Having a good antivirus can make all the difference on the computer. Although you will need more then just an antivirus it is extremely important to have this up first. There are two parts to Step 1, one which is for freeware programs while the other is for purchaseable programs.

Step 1a: Freeware Security

There are several good quality freeware antivirus programs. Not all of them are worth the time however. The following are the top three programs that you can find on the freeware market.

PICK ONLY ONE!
1) Avira:
-http://www.free-av.com/en/download/1/avira_antivir_personal__free_antivirus.html

2) Avast:
-http://www.avast.com/eng/download-avast-home.html

3) AVG:
-http://free.avg.com/
(Try to avoid AVG if at all possible, the detection rates are far less then others)

Step 1b: Purchaseable Security

As with freeware security there is also a good number of purchaseable security programs on the market. There are significantly more programs that are worthwhile however, which makes finding the right one a challenge. The following list are the best you can purchase, but keep in mind the ones to avoid.

PICK ONLY ONE!
1) Norton
-http://www.symantec.com/norton/theme.jsp?themeid=new-2008

2) Kaspersky
-http://usa.kaspersky.com/products_services/HomeProducts.php

3) Nod32
-http://www.eset.com/products/

AVOID THESE!
1) Trend Micro
2) McAfee
3) Computer Associates


Step 2: Firewall Protection

Having a good firewall is extremely important to help block intrusions and block a good amount of malware. The firewall is able to mask open ports on the computer which can block other people from hacking into your computer. With Windows there is a firewall program built into Windows which is able to do everything you need; that doesn't mean you shouldn't consider a firewall program. I'm only putting up freeware firewall programs because if you need a purchaseable firewall program, get the Internet Security version of the purchaseable anti-virus programs above.

Step 2a: Freeware Firewalls

PICK ONLY ONE!

1) Comodo Firewall:
-http://www.personalfirewall.comodo.com/

2) Webroot Firewall:
-http://www.webroot.com/En_US/consumer-products-desktopfirewall.html

3) PC Tools Firewall:
-http://www.pctools.com/firewall/


Step 3: Active Anti-spyware Protection

Although you may have picked an anti-virus program that "includes" anti-spyware it's still important to have extra protection. These programs catch a lot and monitor areas that anti-virus programs do not which makes them invaluable for protection. Do not confuse active protection with removal however. Programs like Spyware Doctor, Counterspy, and Malwarebytes are all great for removal but take to much in resources to be quality active protection. There is a mixture of either or and freeware/purchaseable programs below:

Step 3a: Recommended Active Protection

1) Spywareblaster
- http://www.javacoolsoftware.com/spywareblaster.html

2) PC Tools Threatfire
- http://www.threatfire.com/
OR
2) Spy Sweeper w/AV
-http://www.webroot.com/En_US/consumer-products-spysweeper.html


Step 4: Internet Browsers And Security

Picking the right browser and security can make all the difference. Some browsers are more secure then others and with good protection you can make sure that you're not going somewhere that could be very dangerous for your system.

Step 4a: Freeware Browsers And Security

1) Firefox 3
-http://www.mozilla.com/en-US/firefox/

2) McAfee Site Advisor
-http://www.webroot.com/En_US/consumer-products-spysweeper.html


Step 5: Completion

With that your computer should be protected. Just be careful about what you download and always pay attention and keep your software updated.

Control Panel Disabled

If you open the Start Menu or Windows Explorer and find that the Control Panel is missing from the list:


Then this guide can help you to enable the Control Panel again:

1) Click the Start Button
2) Click the Run Command
3) In the Run Command Windows type "regedt32"
4) Navigate to each of the following areas and change the value as listed:

[HKEY_CURRENT_USER\Software\Microsoft\Windows\CurrentVersion\Policies\Explorer]


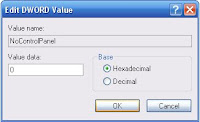
Set Value For "NoControlPanel" to "Zero"


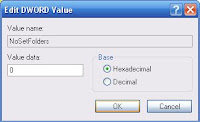
Set Value For "NoSetFolders" to "Zero"


5) Restart the computer
6) Now the Control Panel should be enabled and returned to the Start Menu

Recommended Tools:
-Try this custom fix to automatically fix the problem:

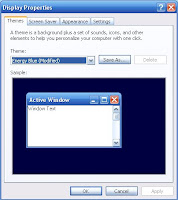
Display Properties Desktop Tab Missing

If you open Display Properties and find that the Desktop tab is missing:


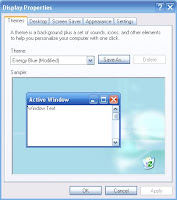
Then follow these easy steps to fix the problem:

1) Click the Start Button
2) Click the Run Command
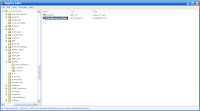
3) In the Run Command Windows type "regedt32"
4) Navigate to each of the following areas and change the value as listed:

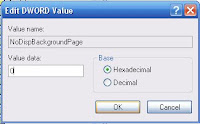
[HKEY_CURRENT_USER\Software\Microsoft\Windows\CurrentVersion\Policies\System]


Set Value "NoDispBackgroundPage" to "Zero"


5) Restart the computer
6) The Desktop Tab should be returned to Display Properties


Recommended Tools:
-Try this custom fix to automatically fix the problem:

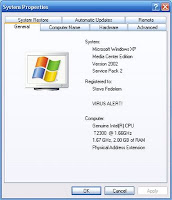
Virus Alert! In Clock And System Properties

If you're having a problem with "Virus Alert!" is appearing in your Windows Clock in the right hand corner and appearing in your System Properties tab as Product ID:


Then getting rid of them is very simple if you follow these steps:

1) Click the Start Button
2) Click the Run Command
3) In the Run Command Windows type "regedt32"
4) Navigate to each of the following areas and change the value as listed:

[HKEY_CURRENT_USER\Control Panel\International]


Set value for "sTimeFormat" to "h:mm:ss tt"


[HKEY_LOCAL_MACHINE\Software\Microsoft\Windows NT\CurrentVersion]


Set value for "ProductId" to " "


5) Restart the computer
6) The "VIRUS ALERT!" message should be removed from the computer

Recommended Tools:
-Try this custom tool to automatically fix your problem:

Logoff Button Missing From Start Menu

If the Logoff button is missing from the Start Menu then follow this guide to return access:


1) Click the Start Button
2) Click the Run Command
3) In the Run Command Windows type "regedt32"
4) Navigate to each of the following areas and change the value as listed:

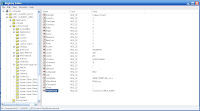
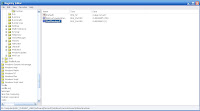
[HKEY_CURRENT_USER\Software\Microsoft\Windows\CurrentVersion\Policies\Explorer]


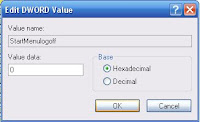
Set Value For "StartMenuLogoff" to "Zero"


5) Restart the computer
6) The Logoff button should now be returned to the Start Menu


Recommended Tools:
-Try this custom fix to automatically fix the problem:

Content Advisor Removal

1) Click the Start Button
2) Click the Run Command
3) In the Run Command Windows type "regedt32"
4) Navigate to each of the following areas and change the value as listed:

"HKEY_LOCAL_MACHINE\Software\Microsoft\Windows\CurrentVersion\Policies"

5) On the right hand side you should see the word "Key"
6) After finding the word "Key" select it in the right pane and click delete
7) Restart the computer

Now Content Advisor should be disabled.

Recommended Tools:
-Try this custom tool to automatically remove Content Advisor:
download

Power Antivirus 2009 Removal

Power Antivirus 2009 is made by the same company that created Antivirus XP 2008/2009. The programs are almost exactly identical except for the different registry and filenames. This is another attempt to bring a new rogue antivirus program to trick users.

Threat Level:
Extreme

Associated Files:

C:\Program Files\Power-Antivirus-2009
C:\Program Files\Power-Antivirus-2009\Buy.url
C:\Program Files\Power-Antivirus-2009\Help.url
C:\Program Files\Power-Antivirus-2009\HowToBuy.txt
C:\Program Files\Power-Antivirus-2009\ID.dat
C:\Program Files\Power-Antivirus-2009\License.txt
C:\Program Files\Power-Antivirus-2009\Power-Antivirus-2009.exe
C:\Program Files\Power-Antivirus-2009\Restart.exe
C:\Program Files\Power-Antivirus-2009\Uninstall.exe
%UserProfile%\Application Data\Power-Antivirus-2009
%UserProfile%\Application Data\Power-Antivirus-2009\base.dat
%UserProfile%\Application Data\Power-Antivirus-2009\base2.dat
%UserProfile%\Application Data\Power-Antivirus-2009\Desc.dat
%UserProfile%\Application Data\Power-Antivirus-2009\Power-Antivirus-2009.ini
%UserProfile%\Application Data\Power-Antivirus-2009\spline.dat
%UserProfile%\Desktop\Power-Antivirus-2009.lnk
C:\Documents and Settings\All Users\Start Menu\Programs\Power-Antivirus-2009
C:\Documents and Settings\All Users\Start Menu\Programs\Power-Antivirus-2009\Purchase License.lnk
C:\Documents and Settings\All Users\Start Menu\Programs\Power-Antivirus-2009\Start Power-Antivirus-2009.lnk
C:\Documents and Settings\All Users\Start Menu\Programs\Power-Antivirus-2009\Support Page.lnk

Associated Registry Entries:

HKEY_CURRENT_USER\Software\Power-Antivirus-2009'
HKEY_CURRENT_USER\Software\Microsoft\Windows\CurrentVersion\Run "Power-Antivirus-2009"

Run Command Disabled

The Run Command is used to open programs, executables, etc. from a previously known path on the computer. The key features it opens are: Regedt32, CMD, and MSCONFIG

If you are receiving this message:

"Run Command has been disabled by Administrator"

Then try the following steps:

1) Open My Computer > C Drive > Windows
2) Scroll down the list past the folders and find an icon for "regedit"
3) Double click the icon to open the registry editor
4) Navigate to each of the following areas and change the value as listed:

[HKEY_CURRENT_USER\Software\Microsoft\Windows\CurrentVersion\Policies\Explorer]
Set "NoRun" Value to Zero

5) Restart the computer
6) The Run Command should be enabled after this has been completed.

Recommended Files:
-Try this custom script to autmoatically fix the problem for you:
download

Command Prompt (CMD) Disabled

Command Prompt, also known as CMD, is an emulation of DOS that runs natively from the Windows desktop. It allows you to perform various tasks on the computer from registry editing to matinenace.

If you are receiving this message:

"Command Prompt has been disabled by Administrator"

Then try the following steps:

1) Click the Start Button
2) Click the Run Command
3) In the Run Command Windows type "regedt32"
4) Navigate to each of the following areas and change the value as listed:

[HKEY_CURRENT_USER\Software\Policies\Microsoft\Windows\System]
Set "DisableCMD" Value to Zero

5) Restart the computer
6) CMD should be enabled after this has been completed.

Recommended Files:
-Try this custom script to autmoatically fix the problem for you:
download

Virtumonde/Vundo/Winfixer Removal

Virtumonde, which also goes by Vundo and Winfixer is the most notorious trojan that you can get on your computer. It is very effective of burying itself deep into the computer and is one of the hardest programs to remove. Due to the nature of the program it is not as simple as find the files or registry values and delete them; many times you will need to perform a large removal. Sometimes that isn't enough and requires the computer to be reformatted. There are a few programs that specialize in Virtumonde removal:

Threat Level:
Extreme

Recommended Programs:
1) Vundo Fix:
-This program is designed specifically to take on Vundo and is quite adept at taking care of a good portion of the files.
http://vundofix.atribune.org/
2) Smitfraudremoval:
-This program does a very basic scan for removing Vundo programs.
http://siri.urz.free.fr/Fix/SmitfraudFix_En.php

Recommended Removal Guides:

After having run both programs I would recommend running the full Generic Virus Removal Guide to make sure you completely irradicate Virtumonde:

http://ultcomprepair.blogspot.com/2008/07/generic-virus-removal-guide.html

Starware 2009 Removal

Starware 2009 is an Internet Explorer toolbar that monitors activity online and can redirect or force popup ads while browsing.

Threat Level:
Moderate

Associated Processes To End:
Starware337Uninstall.exe
Starware347Uninstall.exe
Starware316Uninstall.exe
Starware358Uninstall.exe
Starware305Uninstall.exe
starware[1].exe
Starware_30[1].exe
9cc045af42.exe
sinstaller.exe
starware_305.exe
starware43.exe
starware44.exe
widgets725.exe
9cc045af42.exe
starwareuninstall.exe
sinstaller.exe
starware_305.exe
starware43.exe
starware44.exe
widgets725.exes
tarwareuninstall.exe

Associated File Paths:
ProgramFiles\Starware337
AppData\Starware337
AllUsersProfile\Application Data\Starware337
ProgramFiles\Starware347
ProgramFiles\Starware316
ProgramFiles\Starware358

Associated File Entries:
Starware337Uninstall.exe
Starware347Uninstall.exe
jokester.dll
Starware386.dll
Starware381.dll
Starware316Uninstall.exe
Starware316.dll
Starware358Uninstall.exe
Starware358.dll
Starware305Uninstall.exe
starware[1].exe
Starware305.dll
Starware_305[1].exe
blocker.curperflib_perfdata_288.dat
starwareconfig.xml
star_16.icobrand.bmpstarware.dll
9cc045af42.exesinstaller.exe
starware_305.exe
starware43.exe
starware44.exe
widgets725.exe
widgets725.exe
starwareuninstall.exe
blocker.cur9cc045af42.exe
perflib_perfdata_288.dat
starwareconfig.xml
star_16.icobrand.bmp

Associated Registry Entries:
HKEY_LOCAL_MACHINE\software\microsoft\windows\currentversion\explorer\browser helper objects\{ca356d79-679b-4b4c-8e49-5af97014f4c1} HKEY_LOCAL_MACHINE\software\microsoft\windows\currentversion\uninstall\starware
HKEY_LOCAL_MACHINE\software\microsoft\internet explorer\toolbar {d49e9d35-254c-4c6a-9d17-95018d228ff5}
HKEY_CURRENT_USER\software\starware\options HKEY_CURRENT_USER\software\starware
HKEY_CLASSES_ROOT\clsid\{d49e9d35-254c-4c6a-9d17-95018d228ff5} HKEY_CLASSES_ROOT\clsid\{ca356d79-679b-4b4c-8e49-5af97014f4c1} HKEY_CLASSES_ROOT\clsid\{7bed0340-176b-44bc-915e-c21c1dd6f617} HKEY_CLASSES_ROOT\clsid\{2d51d869-c36b-42bd-ae68-0a81bc771fa5} HKEY_LOCAL_MACHINE\software\microsoft\windows\currentversion\uninstall\starware

Specific Virus Removal Guides

Antivirus XP 2008/2009 Removal Guide
Power Antivirus 2009 Removal Guide
Starware 2009 Removal Guide
Virtumonde/Vundo/Winfixer Removal Guide

XPCSpy Removal Guide

Generic Virus Removal Guide

Generic Virus Removal Guide

Diagnostic And Repair Guides

Analyzing Minidumps

Important Diagnostic Tools

Unmountable Boot Volume

Unknown Server Execution Failed

Vista Notification Icons Missing

Windows XP - Fix Boot.ini

Windows XP - Fix Master Boot Record

Effects Changed By Virus


Control Panel Disabled


Display Properties Desktop Tab Missing


Logoff Button Missing From Start Menu


Restore All Programs To Start Menu

Restore Drives To My Computer


Virus Alert! In Clock and System Properties

Perform System Restore

To perform a system restore just perform these steps:

1) Click the Start button
2) Follow the menus for the following:

All Programs > Accessories > System Tools > System Restore

3) Click "Next" when the System Restore window appears
4) Select a suitable date (generally before the problem occurred) when the "Select A Restore Point" screen appears
5) Click "Next" after choosing the restore date
6) After Windows completes the System Restore click "Finish" and let the computer restart

Screensaver Disabled

1) Click the Start Button
2) Click the Run Command
3) In the Run Command Windows type "regedt32"
4) Navigate to each of the following areas and change the value as listed:

[HKEY_CURRENT_USER\Software\Policies\Microsoft\Windows\Control Panel\Desktop]
Set "ScreenSaveActive" Value to Zero

5) Restart the computer
6) The Screensaver should be enabled and you should be avaliable to change

Recommended Files:
-Try this custom script to autmoatically fix the problem for you:
download

Analyzing Minidumps

A minidump is a file that is created when there is an error in Windows that causes the system to suddenly stop working (crashing) and is generally the result of a Blue Screen (BSOD). These files can be extremely useful in identifying the cause and leading to the solution of what is causing these problems. Just follow these steps and you to will be able to analyze your computer.

1) Download Debugging Tools for Windows program, there are a 32 Bit and 64 Bit versions:


2) Once installed open the Debugging Tools program. Under the start menu you will find it under the corresponding folder name and the program is titled WinDbg.


3) Now you will need to browse to your Minidump files. They are generally located within this folder:

My Computer > C Drive > Windows > Minidump


The date will tell you when the last time the computer crashed. Start from your latest minidump and then continue from there.


4) Once you open the file you'll see it populate an entire list. For general purposes we won't be analyzing anything indepth. Just type:

!analyze -v

This will prompt it to analyze the dump file and give you the file that is causing the problems.


5) Once the file has been analyze it will report the Image Name (amongst other things). Whatever file is listed there is the cause of the BSOD.


6) Now before you try to figure out the file it would be best to analyze any other dump files that you saw listed. Make sure you note each and every file that caused a crash because the more information that you have the easier it will be to analyze the problem. In order to analyze another minidump though you first have to close the WinDbg program and start the process over again from Step 2.

7) After you have collected all the information on the files that caused the problem, type the file name into Google:


8) After the Google search there will be several websites that have documentation on what the particular files control within the system. By checking out those files sometimes you can find the answer to what may have caused the crash.


9) If you have any further questions feel free to contact me with your query. For help with minidump please attach all the minidump files you have in a Zip format to your email. Also include any file names that you have found when analyzing these files.

XPCSpy Removal

XPCSpy is a key logging program that keeps track of user information, key strokes, takes screenshots, monitors conversations, monitors emails, and collects any data from the user of the computer.

Threat Level:
High

Associated Processes To End:
-expcspypro.exe
-rx.exe
-systemout.exe
-xpcspypro.exe


Associated Files:
-C:\Program Files\XSoftware\xpcspypro.exe, appspy.dll, iespy.dll, keyspy.dll
-C:\Program Files\XSoftware\XPCSpyProxpcspypro.exe, appmon.dll, iemon.dll, keymon.dll
-C:\Windows\System, C:\Windows\System32 or C:\Winnt\Workingrx.exe, systemout.exe, sysdll32.dll
-C:\Windows\System\Drivers, C:\Windows\System32\Drivers or C:\Winnt\System32\Drivers\System32systemin.sys


Associated Registry Entries:
-HKEY_LOCAL_MACHINE\Software\Microsoft\Windows\CurrentVersion\Explorer\{e3e1dc8e-0ce1-4d96-8d49-e5b2b7b51ada}
-HKEY_LOCAL_MACHINE\Software\Microsoft\Windows\CurrentVersion\run, system check=Rundll32.exe SysDll32.dll,SystemCheck
-HKEY_LOCAL_MACHINE\Software\Microsoft\Windows\CurrentVersion\Shellpath, appdir=[%PROGRAM_FILES%]\XSoftware\Working\
-HKEY_LOCAL_MACHINE\Software\Microsoft\Windows\CurrentVersion\Explorer\ {e3e1dc8e-0ce1-4d96-8d49-e5b2b7b51ada}
-HKEY_LOCAL_MACHINE\Software\Microsoft\Windows\CurrentVersion\run, system check
-HKEY_LOCAL_MACHINE\Software\Microsoft\Windows\CurrentVersion\run, xpcspy start
-HKEY_LOCAL_MACHINE\Software\Microsoft\Windows\CurrentVersion\shellpath, appdir
-HKEY_LOCAL_MACHINE\Software\Microsoft\Windows\CurrentVersion\uninstall, appswebservice.com=search assistant
-HKEY_CLASSES_ROOT\appmon.tshellexecutehook
-HKEY_CLASSES_ROOT\Clsid\{17a54bfc-8214-4f5c-b1a7-a161bfa5fdcc}
-HKEY_CLASSES_ROOT\Clsid\{ba41ee62-b36a-4344-850c-9221073cf6b9}
-HKEY_CLASSES_ROOT\Clsid\{e3e1dc8e-0ce1-4d96-8d49-e5b2b7b51ada}
-HKEY_CLASSES_ROOT\Iemon.Iespy
-HKEY_LOCAL_MACHINE\Software\Microsoft\Windows\CurrentVersion\Explorer\Browser Helper Objects\{17a54bfc-8214-4f5c-b1a7-a161bfa5fdcc}
-HKEY_CLASSES_ROOT\Appspy.tshellexecutehook
-HKEY_LOCAL_MACHINE\System\CurrentControlSet\Services\Systemoutservice

Fix .EXE Files

If you are having a problem where you are unable to open .EXE files (shortcuts, programs, etc) then I would recommend downloading this customer registry fix. It's a little involved otherwise I would write out the entire listing here.

Recommended Tools:
-This is the custom tool to automatically fix the EXE problem. Just restart after running.
download

Unmountable Boot Volume

If your computer boots up with an "Unmountable Boot Volume" on a black screen and won't go past that, then there's a problem with the hard drives partition table. There are a few ways to solve this:

Recommended Tools:
-Bootable DFT
-Windows Recovery Disc
-Windows Bootable Enviroment

Steps:
1) First test the hard drive status using Bootable DFT
2) Even if the drive fails just note the error code, usually 0X70 or 0X72 are file system errors while 0X74 means a SMART failure (which would mean the drive is dead)
3) Boot off the Windows CD
4) Hit "R" to enter the Recovery Console
5) Select the Operating System you are repairing
6) Once you reach the command prompt type:

"chkdsk /r"

7) Chkdsk will run through a five stage process, once it completes restart the computer
8) Upon startup run the Bootable DFT program again
9) If there are no errors returned the problem is fixed, reboot and see if you can access Windows. If you get another error it would be best to consult your manufacturer and replace the hard drive.
Contact: thetechgurus@yahoo.com